Lapidary Tips: DIY Inexpensive Lapidary Grinder

This blog describes how you can build an inexpensive diamond lapidary grinder that will economically handle a lot of grinding tasks that should never be done on diamond wheels. Any lapidarist quickly learns that using diamond grinding wheels is expensive because diamond coatings are thin and wear off relatively fast.

Galaxy Grinding Wheel

It’s necessary to use expensive grinding wheels when the stone surface requires minimal scratches and is being prepared for sanding and polishing. But here are some grinding tasks where scratches are not an issue and they can be done on the grinder described in this blog: 

  • Removing saw tabs from the corner of slabs
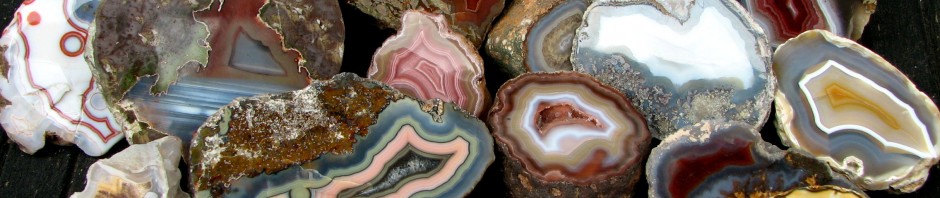
  • Grinding away opaque skin from agates to expose features
  • Shaping rough so it fits slab saw vices
  • Squaring rough to enable a usable first cut slab
  • Removing any unwanted matrix from rough stones 

DIY Grinder

Diamond wheel coatings are only a few microns thick. Compare this with masonry saw blade diamond deposits of 1/8 to 1/4 inch thick which is several hundred times more than on wheels. Saw blades are only 1/32 inch wide but if grouped together with spacers in between, you can create a wide grinding surface. The photo here shows a simple grinder with 6 seven inch blades separated by water hose washers between each blade.  Spacing between blades is about 1/8 inch but you will find that this is not noticeable when grinding. The width of the 6 blades is about 1 inch. The grinder runs quietly and aggressively removes material. You can install water spray to control dust but a simpler alternative is to use a water spray bottle.  It’s a good idea to always wear a dust mask. 

Components for this grinder are:

  • Six 7 inch masonry diamond blades  ($8 each if you shop around)
  • Water hose washers for spacers
  • Used 1800 rpm motor
  • Lortone Splash Shield ($50 unless you build your own)
  • Motor shaft grinder adapter ($10)

 Assuming you have a used motor, you can build this grinder for about $110. And, it’s only $60 or so if you build or have your own splash shield. 

Share your ideas on how to be more cost effective when doing lapidary work.  With the price of equipment and materials these days, we all need more good ideas.

Posted in Lapidary Tips, Tricks, and Techniques | 5 Comments

Jewelry Making Tips: Polishing and Cleaning Jewelry

Have you ever noticed how your sterling silver jewelry can slowly become soiled and tarnished without you realizing it?  The tarnishing process is so slow that you sometimes forget how shiny and beautiful your jewelry was when it was newly cleaned and polished. Over time, makeup, oils, and sweat will take its toll especially in crevices.  Polishing jewelry with a cloth works but it’s hard to polish chain and to clean hard to reach crevices.  Cloth polishing can also strain connectors, prongs, and other weak spots. In addition cloth polishing may not clean as well as you would like. You would think that there must be a better way and there is.  Tumble polishing is easier, faster, and more efficient and it takes care of cleaning and polishing simultaneously. It produces an amazing result.

All of us are probably familiar with or have heard about rock tumblers used for grinding, sanding, and polishing rocks.  Actually, tumbling rocks is a fairly laborious 3 week long messy process using silicon carbide grits to create beautifully polished stones. Interestingly enough this same tumbler can be used to clean and polish jewelry using a process that’s short, clean, and simple.  Instead of using multiple silicon carbide grits you simply use a mixture of stainless steel shot, water, and soap.  Here’s all that you need:

  • A small barrel tumbler like the one in this photo. Chicago Electric Power Tools 67631 3 Lb. Rotary Rock TumblerYou can purchase this tumbler at Harbor Freight for about $30 on sale. It has a rubber barrel and measures about 5 inches x 5 inches. It runs quietly and at low speed.  Click this link for more details:

    http://www.harborfreight.com/3-lb-rotary-rock-tumbler-67631.html

  • Stainless steel shot from Rio Grande:  Purchase one pound of mixed stainless steel shot from Rio Grande Jewelry Supplies.   This shot mix includes 1/8 inch to ½ inch long stainless steel balls, rods, and pins which will clean and burnish silver without damaging stones and beads. One pound of mixed stainless steel shot will cost about $16 and you can purchase it from Rio Grande Jewelry Supplies.  The following link provides more details:

  http://www.riogrande.com/MemberArea/ProductPage.aspx? assetName=339388

  • Dawn liquid soap:  If you don’t already have it, purchase a small bottle of Dawn liquid soap. This soap has an amazing ability to clean jewelry and will help reduce friction between the shot and jewelry surfaces.
  • A stainless steel strainer:  A strainer is used to separate water from the jewelry and shot mix. The one in this photo was purchased at a local grocery store for about $10.  


Here are the steps for cleaning and polishing:

  • Put the stainless shot and up to 10 or so pieces of jewelry into the tumbler barrel.
  • Add enough water to barely cover the jewelry and shot.
  • Add about ½ teaspoon of Dawn Liquid Soap
  • Tighten the barrel lid and start tumbling.
  • After 2 hours or so the polishing will be complete.  Empty the contents into the strainer and rinse thoroughly.  Rinse each piece of jewelry individually and dry it with a towel to prevent water stains.
  • Wash and let the stainless steel shot dry for future use. 

You will be amazed at the how clean and polished the jewelry will look. Repeating this process once every 6 months or so will keep your jewelry looking new. However, here are some tips on what not to do:

  • Do not tumble soft stones or beads like pearls, opals, or extra soft turquoise. Normal or harder turquoise can be tumbled with no problem. 
  • Do not tumble leather, cord, satin, cotton, or other non metallic necklace materials.
  • Do not tumble small necklace chains that may tangle easily with other jewelry.  It’s better to tumble small chains by themselves or with materials like rings or smooth bracelets.

This might not be a practical method for someone with a small amount of jewelry. But, if you have several necklaces, bracelets, and rings, it makes a lot of sense.  The investment of $60 or so will last a lifetime. Using tumbling every 6 months or so is a fast, easy, and effective way to keep your jewelry investment looking new.  

You will be more beautiful than ever!

Posted in Jewelry Making Tips | 1 Comment

Jewelry Making Tips: Recycle Silver Starburst Pendant

Sterling Silver prices are going through the roof.  Since January 2009, the price of silver has more than doubled from $9 to $22 per troy ounce and the upward trend continues.  

Silver Price

This has stimulated recovery companies and jewelry suppliers to aggressively search for unwanted sterling silver jewelry and scrap.  Companies like Rio Grande will pay about 65 cents on the dollar for recycle sterling silver. While this is better than nothing, why not reuse your scrap silver and recover all of its value?  

If you wire wrap jewelry, significant amounts of scrap wire will be generated over time.  The scrap wire will be all shapes from square, half round, to round and all sizes from 18 to 26 gauges.  And, if you silver solder jewelry, scrap silver is generated every time soldering components are trimmed from flat sheets of silver. In addition (we don’t like to admit it) screw ups creates scrap as well. 

One way to effectively recover this scrap is to melt down and reshape the wire into components for pendants, earrings, or bracelets.  To make components for pendants, for example, start by randomly grouping 10 or so wires together into 3 to 4 inch long bundles.  Loosly bind the bundle by wrapping a wire around it. 

Scrap Wire Bundle

Place the bundle on a carbon soldering block with a 3 inch long groove carved into it for retaining and forming the molten silver. Using a soldering torch melt the bundle from one end and then the other while using the torch to shape the molten silver into interesting shaped components.  

Melted Wire Components

Use your imagination and these components to create jewelry like this beautiful solid sterling silver Starburst Necklace.   

Starburst Necklace

With silver prices shooting straight up, Silver and Stones is always looking for ways to be more cost effective.  Will you share some of your ideas for reusing scrap silver? Check back later for more of our examples for recycling sterling silver and check out the links below for more of our techniques for recovering silver:

Posted in Jewelry Making Tips | 2 Comments

LAPIDARY TIPS: EXTENDING CABOCHON MACHINE LIFE

The Diamond Pacific Genie Gem Maker probably sets the standard for lapidary cabbing machines.  A new one will cost about $1800.  Its 6 inch diamond wheels are expensive components that wear out over time.  A complete replacement set of 6 wheels will cost about $600.  That’s $220 for two hard Galaxy wheels and $380 for four soft Nova wheels.  Every cab cutter dreads the day when the diamond wheels wear out and need to be replaced. So what can be done to reduce cab making cost and to extend the life of these machines?  Here are two ways to do it:

  • Use the most aggressive diamond wheel set possible.
  • Buy diamond powder and recoat the worn out Nova wheels.

Using the most aggressive wheel set has two distinct advantages.  First, it lowers cab cost by reducing the cycle time for grinding, sanding, and polishing.  Second, the wheel set will last longer because the heavy grinding, shaping, and scratch removal is done on the left hand side of the Genie leaving significantly easier sanding and pre polish for the right hand side. The table below shows Diamond Pacific’s standard wheel set versus an aggressive wheel set that enables faster grinding, easier scratch removal, good enough sanding, and minimum essential pre polish:

                                                      Standard Grit    Aggressive Grit

  • Wheel 1   Galaxy Grinding                80                   60
  • Wheel 2   Galaxy Grinding              220                  100
  • Wheel 3   Nova Scratch Removal    280                  100
  • Wheel 4   Nova Sanding                   600                  220
  • Wheel 5   Nova Sanding                  1200                 600
  • Wheel 6   Nova Pre Polish               3000                1200                        

Regardless of what wheel set you use, when the Nova wheels wear out don’t throw them away.  Leave them on the Genie for recoating with a diamond powder epoxy mix. Use the following steps to successfully recoat all four Nova wheels for about $40 compared to $380 for new ones. 

  • Step 1:  Remove the splash hoods and water pans.  Clean the Nova wheel surfaces with soapy water. Thoroughly rinse and dry.  Finish cleaning the surfaces with an acetone soaked cloth. 
  • Step 2:  To avoid cross grit contamination, start the diamond coating process with the smallest grit wheel and sequentially move to the more aggressive grit wheels. 
  • Step 3:  Weigh out 10 carats of diamond powder for each wheel.  Mix one teaspoon each of Hughes Epoxy 330 hardener and resin on a 4×4 inch glass plate. Mix the epoxy and diamond together using a flat end Exacto knife. 
  • Step 4:  Using the Exacto knife, transfer some of the diamond mixture to the end of a 1.5 inch wide spatula.  Using the spatula, evenly spread the mixture on the wheel surface while turning the shaft by hand. When the wheel is evenly coated with all of the diamond mixture, quickly bump the motor to turn the shaft slowly while applying steady pressure on the wheel surface with the spatula.  Do not let the wheel turn fast or the diamond mixture will be spun off.  Stop as soon as the coating looks and feels evenly spread. 
  • Step 5:  Clean the glass plate with acetone and repeat the process for the other 4 wheels. Let the epoxy cure for at least a day.

Diamond powder can be purchased from Kingsley North.  100 carats will cost about $54 and is enough to recoat 10 wheels.  Epoxy 330 can be purchased in a number of places for about $4.00 which is enough to recoat four wheels.  If your recoated wheels wear out, recoat them again.

Check back later for another way to significantly extend the life of your Genie cabbing machine.  Maybe you can share some good ideas as well.

Posted in Lapidary Tips, Tricks, and Techniques | 2 Comments

Hot Rock Hounding Spots: Needle Peak, Texas

If you are looking for one of the most remote and fascinating agate and fossil hunting areas in the US,  Needle Peak may be the place.  Almost all rock hunting is on surface terrain which has eroded and exposed rocks and fossils in arroyos, washes, flats and crevices.  Here are some of Needle Peak features:

Needle Peak

  •  Located 6 miles SW of the ghost town of Terlingua, Texas
  • Arid mountainous terrain at 2300 feet elevation
  • Close to the Mexican border and adjacent to Big Bend National Park
  • Formed by lava flows 65 to 100 million years ago (late Cretaceous period)
  • Dinosaurs were at their peak during this period 

What’s exciting about rock hunting at Needle Peak is the array of material available and never knowing what you will find next.  The area is rich in agates and fossils including: 

  • Agates: Pom Pom, Green Moss, Gold Moss, Seam, Banded, and Thistle
  • Fossils: Dinosaur Bone, Shark Teeth, Turritella, and many more
  • Petrified Wood
  • Minerals:  Aragonite pseudo morphs, gypsum, fluorescent calcite, chalcedony fingers 

The best way to describe the array of material found at Needle Peak is with photographs:

Needle Peak Hydrosaurs Dinosaur Tooth

Needle Peak Dinosaur Bone

Needle Peak Pom Pom Agate

Needle Peak Aragonite Pseudomorph

Needle Peak Golden Moss Agate

Needle Peak Gypsum

NP Chalcedony Fingers

Needle Peak Calcite

NP Embedded Crystals Cabochon

Needle Peak Fortification Agate

Rock hunting at Needle Peak requires a 4WD vehicle and can only be done with guides because the land is privately owned.  It’s probably not a good idea to take children without first talking to a guide.  Two very good guides can take you there and each one has access to different areas:

  • Trey Woodward–owner of the well known rock hunting ranch called “Woodward Ranch” located 16 miles south of Alpine, TX. The Woodward ranch itself produces some excellent red and black plume and other types of agates. Contact the Woodward Ranch at 432-364-2271. 
  • Teri Smith–Owner of the Antelope Lodge in Alpine, TX.  Teri has access to several rock hunting ranches near Alpine, Marfa, and Terlingua, TX.  Contact Teri at:  agatehunter@sbcglobal.net 

Maybe you have already been to Needle Peak and can share some interesting photos.  If you haven’t been there, it’s a true adventure especially if you visit Big Bend National Park as well.  Stay tuned for more blogs on hot rock hounding spots.

Posted in Hot Rockhounding Spots | 1 Comment

Jewelry Making Tips: Recycle Silver Balls For Pendant Enhancement

Sterling Silver prices are going through the roof.  Since January 2009, the price of silver has more than doubled from $9 to $22 per troy ounce and the upward trend continues.

Silver Price

This has stimulated recovery companies and jewelry suppliers to aggressively search for unwanted sterling silver jewelry and scrap.  Companies like Rio Grande will pay about 65 cents on the dollar for recycle sterling silver. While this is better than nothing, why not reuse your scrap silver and recover all of its value?  

If you wire wrap jewelry, significant amounts of scrap wire will be generated over time.  The scrap wire will be all shapes from square, half round, to round and all sizes from 18 to 26 gauges.  And, if you silver solder jewelry, scrap silver is generated every time soldering components are trimmed from flat sheets of silver. In addition (we don’t like to admit it) screw ups creates scrap as well.

One way to efficiently recover this scrap is to convert the scrap wire to solid silver balls.  These balls can be soldered around pendant bezels and significantly enhance the pendant.   First, cut pieces of the same type of scrap wire into about 3 inch long sections. 

Scrap Wire Made Into Balls

For 20 gauge wire, for example, these sections will weigh about 0.6 grams.  Individually place these sections of wire on a carbon soldering block.  Using a soldering torch melt each wire until it forms a molten sphere.  Watch the molten silver carefully and when it takes a mirror finish and is perfectly round, remove the torch.  Pick up the ball with tweezers and drop it in water.  These balls will be about 6mm in diameter and will have a flat bottom which will facilitate soldering later on.  Matching balls can be made by weighing out equal amounts of wire or by using exact lengths of the same type wire.   Balls that are too small can be remelted and made larger by adding more melted wire.

Think about different creative ways to use these balls when making your jewelry.  The pendant in this photo is a great example.  

Turquoise Pendant with Silver Ball Border

With silver prices shooting straight up, we all need to develop ways to be more efficient.  Silver and Stones is always thinking about ways to use:

  • scrap wire from wire wrapping
  • scrap silver sheet trim from silversmithing
  • scrap work pieces from screw ups

Will you share some of your ideas for reusing scrap silver? Check back later for more examples and check out the links below for some of our other silver recovery techniques: 

  • https://silverandstone.wordpress.com/2010/10/05/jewelry-making-tips-reusing-scrap-silver-3/
  • https://silverandstone.wordpress.com/2010/10/04/jewelry-making-tips-reusing-scrap-silver/
  • Posted in Jewelry Making Tips | 3 Comments

    Jewelry Making Tips: Recycle Silver Freeform Pendant Mounting

    Sterling Silver prices are going through the roof.  Since January 2009, the price of silver has more than doubled from $9 to $22 per troy ounce and the upward trend continues.  

    Silver Price

    This has stimulated metal recovery companies and jewelry supply companies to aggressively search for unwanted sterling silver jewelry and scrap.  Companies like Rio Grande will pay about 65 cents on the dollar for recycle sterling silver. While this is better than nothing, why not reuse your scrap silver and recover all of its value?    

    If you wire wrap jewelry, significant amounts of scrap wire will be generated over time.  The scrap wire will be all shapes from square, half round, to round and all sizes from 18 to 26 gauges.  And, if you silver solder jewelry, scrap silver is generated every time soldering components are trimmed from flat sheets of silver. In addition (we don’t like to admit it) screw ups creates scrap as well.  

    One way to efficiently recover this scrap is to melt it down and reshape it into a freeform solid silver bezel pendant mounting.  Weigh out about one ounce of scrap silver wire and/or scrap silver sheet.  Place the scrap on a carbon soldering block.  Depending on what type of pendant surface finish you want, the block surface can be smooth or rough. The molten silver will take the same shape as the block surface.  If you like you can carve a 1/8 inch deep mold into the carbon block (for example a horseshoe) to contain the molten silver.  Use a soldering torch to melt the silver and simultaneously heat a carbon paddle which will be used to flatten the blob of molten silver .  Heating the paddle avoids thermal shocking and cracking the molten silver.

    Carbon Paddle

    Use the heated paddle, to gently press the molten silver to the desired thickness.  Then remove the torch and use tweezers to place the hot silver  in water for cooling.  Solder on the bezel, set the stone, and solder on the bail.

    Turquoise Pendant From Scrap Silver

    The beautiful turquoise semi rough surface pendant in the photo on the right was made using this technique.  

    With silver prices shooting straight up, we all need to be more efficient.  Will you share some of your ideas for reusing scrap silver? Check back later for more silver recovery examples and check our other silver recovery blogs:

    Posted in Jewelry Making Tips | 2 Comments

    About Unique Semiprecious Stones: Fake Gemstone Beads

    One of the oldest techniques for enhancing or faking stones is dying.  It’s relatively easy with porous stones like howlite which can be dyed to look like turquoise where the pores and spaces between the micro crystals allow dye to penetrate.  However, single crystal gems like aquamarine and quartz are not good candidates because the dye will only penetrate surface fractures.  We want to share our experience identifying fake beads purchased in the heart of aquamarine and tourmaline pegmatite mining country in mineral rich Minas Gerais , Brazil.

    Our trip to Brazil was a group tour specifically organized for studying and purchasing gemstones and mineral specimens.  It was sponsored by the Los Angeles Museum of Natural History so we were among several gem experts.  Over a two week period, we visited numerous gemstone mines, dealers, museums, and gem shows.  At every location in every town we were eagerly greeted by 5 to 10 persistent “street dealers” offering cut gemstones, beads, and mineral specimens at ridiculously low prices.  We were fully aware that some offerings were fakes and some were real, but the prices were so low it really didn’t matter much at the time.  Because aquamarine and other beryl gemstones were abundant in the area, one of our purchases from a street dealer was aquamarine, citrine, green tourmaline, and amethyst chip beads. 

     Recently we decided to use these beads to make an attractive necklace.

    Necklace Before Tumbling

    After finishing necklaces our standard practice is to use a rock tumbler with steel shot to clean and polish the silver.  After the short tumbling process we looked at the necklace and discovered that the beautiful aquamarine and citrine was only clear quartz.

    Necklace After Tumbling

    This was the bad news. The good news was that we made the discovery and not one of our customers.  Our mistake was to assume that these beads were real instead of checking them out.  In less than 5 minutes we could have identified the fake beads by simply wiping them with a cloth soaked in rubbing alcohol or acetone. When wiped with the cloth the aquamarine turned white and the cloth turned blue.  Both the citrine and aquamarine were fakes, but the tourmaline and the amethyst were real.  One further surprise, we like the necklace better without the dyed beads!

    Silver and Stones is always interested in learning more about how to identify fake gemstones.  Can you share a similar experience?

    Posted in About Unique Semiprecious Stones | Leave a comment

    Jewelry Making Tips: Soldering Dissimilar Metals

    All sterling silver oxidizes (tarnishes) over time.  But, if the components of a pendant, for example, are joined with Easy instead of Hard Solder, the soldered area may discolor more rapidly.  Silversmiths have three choices when silver soldering jewelry.

    In all three cases the jewelry will look the same initially. The three choices are:

    • Easy Solder which melts at 1325F
    • Medium Solder– 1390F
    • Hard Solder– 1425F

    Since sterling silver will melt at 1640F, it’s “easier” to join components without distorting the sterling silver or melting other soldered joints with Easy Solder because it melts 315 degrees below the sterling silver. The margin of error with Hard Solder is only 215 degrees. The problem is that Easy and Medium Solder contain more copper and zinc but less silver than Hard Solder. Consequently, softer solders:

    • have less strength
    • discolors more rapidly due to dissimilar metal corrosion
    • makes jewelry almost impossible to repair if needed

    The bottom line is that it’s higher quality jewelry if the silversmith uses Hard Solder.  Before you buy sterling jewelry or commission a custom piece, ask your jeweler or silversmith if their sterling silver jewelry is made using hard solder.

    This may explain why your jewelry discolors in the soldered areas and maybe it will help you avoid the problem in the future.   More jewelry making tips are coming!

    Posted in Jewelry Making Tips | 1 Comment

    Hot Rockhounding Spots: Bouquet Agates

    Bouquet Agate

    Bouquet agates are agates embedded with tiny colorful flower “bouquets” rather than the more common banded agate like those in the header photo above. Where are these most lovely and rare agates found? Bouquet agates are found in the Trans Pecos region which extends from the Chihuahua desert in northern Mexico through the scenic, arid mountains of Big Bend National Park and Gaudalupe  National Park in west Texas. Our rock hunting adventure began in the U.S. border town of Presidio, Texas and took us to the football field sized agate bed of  Manual Benavides which is 12 miles south of Lajitas, Texas.  This agate bed is so remote we wondered how it was ever discovered! Yet getting there (with a guide) is only the start.  Now the hard work really begins; the agates are typically buried 6-12 inches underground just above a layer of green volcanic basalt. Uncut agates usually range in size from 1-5 inches in diameter, are egg shaped and absolutely ugly! 

    Bouquet Agate Rough

     Only when hand cut by a diamond saw are the delicate, colorful bouquets revealed.  However, about 9 in 10 are disappointments with only clear chalcedony centers, so we gather as many as possible in the dry Mexico sun hoping for a few of the spectacular bouquets!   To see many more photographs of these incredible stones go to Matt Dillon’s FlickR site: http://www.flickr.com/search/?q=bouquet&w=97769244%40N00  

    Check back soon for more of our rock hounding adventures in Mexico, the American Southwest, Brazil, and Namibia and beyond!  Silver and Stones is always interested in learning about interesting rock hounding adventures.  Can you share your experiences with remote rock hounding sites?

    Posted in Hot Rockhounding Spots | Leave a comment